Invoice management is the process of creating, tracking, and organizing invoices for products or services sold.
Each invoice includes essential details such as items, prices, taxes, total amount, and payment terms.
This system helps businesses improve billing accuracy, monitor payments, and maintain clear financial records.
Now that we understand the basics, let’s explore the different methods to create invoices in an ERP system.
Two Ways to Create an Invoice
The platform allows you to create invoices in two main ways:
Manual Invoice Creation: When no sales or purchase order are involved.
Automated Invoice Creation: Based on the Sales flow, from Quotation to Invoice.
Let’s explore both in detail.
1. Manual Invoice Creation
Users can manually create and manage invoices for specific sales or services, with the flexibility to edit details and maintain accurate billing records within the system.
Steps to Create an Invoice Manually:
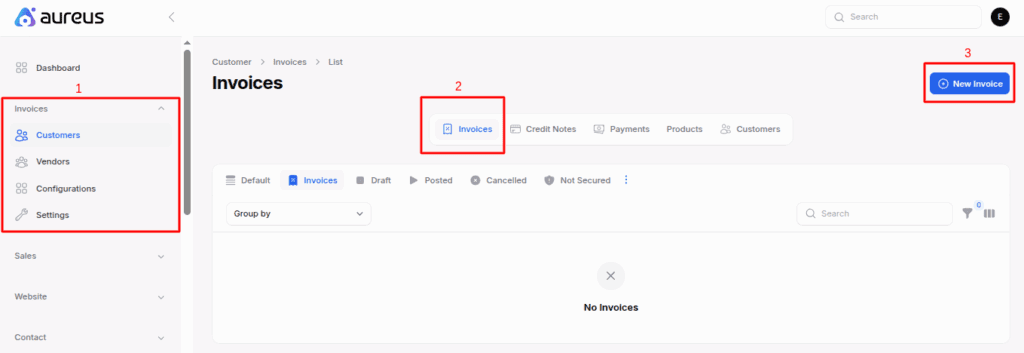
Go to Invoices → Customers → Invoices→ New Invoice
Invoices: The main section where you can manage all billing and payment records.
Customers: Shows the list of clients or buyers for whom you create invoices.
Invoices (under Customers): Displays all invoices linked to a specific customer.
New Invoice: Used to create a new invoice by adding product details, prices, and payment terms.
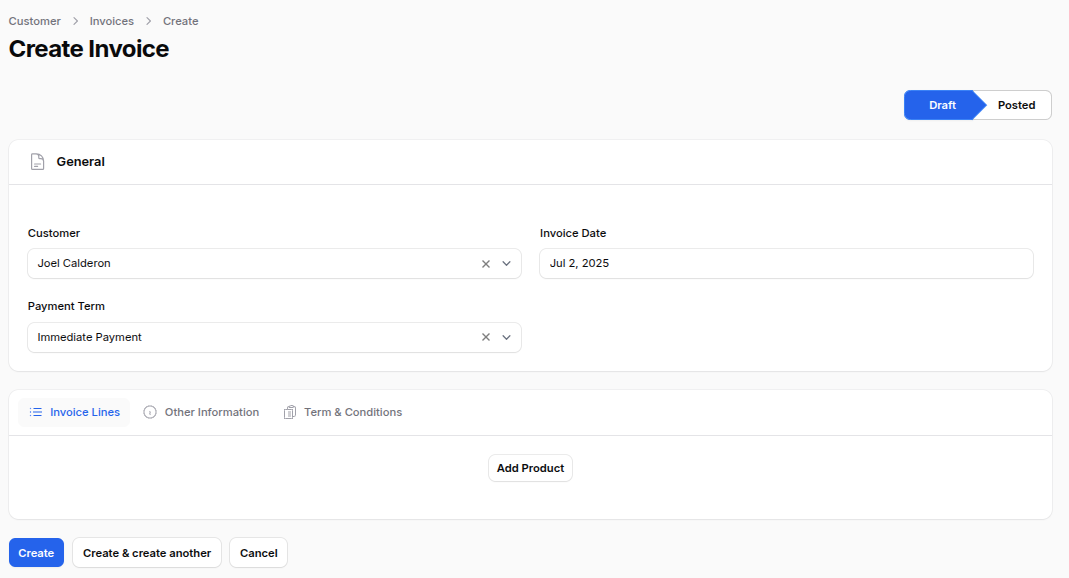
2. Fill out the invoice form, which is divided into different sections:
General Section
Customer: Select the customer you’re billing.
Invoice Date: Choose when the invoice is generated.
Due Date: Set the last date for payment.
Payment Term: Select the payment term, like “Net 30” or “Immediate”.
If you select a payment term, the system automatically sets the Due Date based on it.
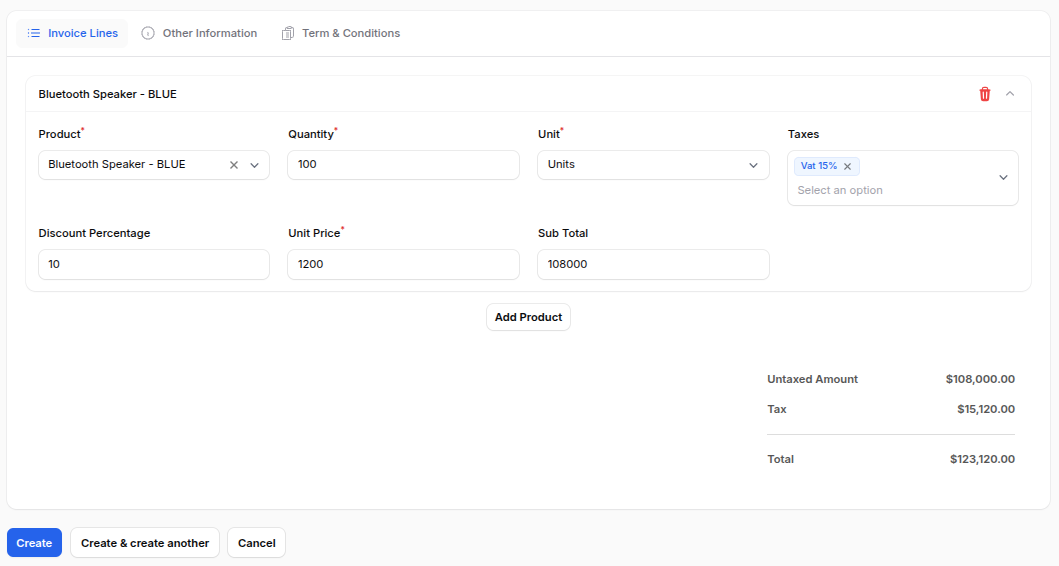
Invoice Lines
In this section, you can add the products or services that need to be billed.
Click Add Product to open the line item fields where you can enter details like Product Name, Quantity, Unit (e.g., Units, Dozens), Taxes, Discount (%), and Unit Price.
The system automatically calculates the Subtotal based on the values you enter, ensuring accurate billing every time.
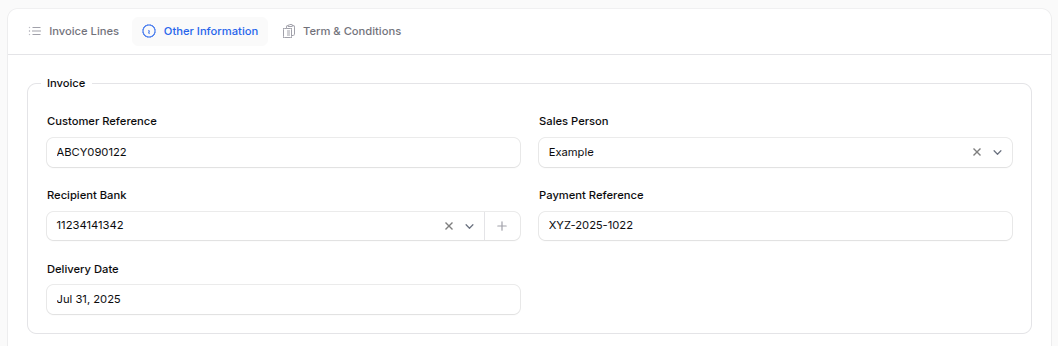
Other Information
This section includes additional billing and sales details to ensure accurate record keeping.
Invoice Subsection:
Customer Reference: Customer’s order or reference number.
Sales Person: Person handling the sale.
Recipient Bank: Bank account for receiving payment.
Payment Reference: Transaction or payment ID.
Delivery Date: Date of goods or service delivery.
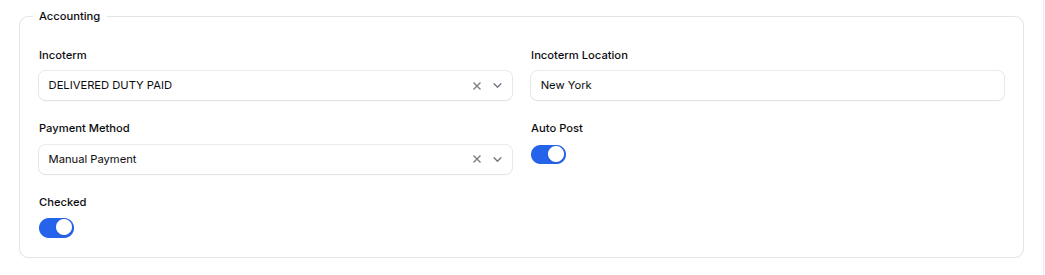
Accounting Subsection:
This part covers key financial details for the invoice.
Incoterm and Location: Defines delivery terms and the location agreed with the buyer.
Payment Method: Select how the payment will be made (e.g., Credit Card, Bank Transfer).
Auto Post: Automatically submits the invoice once confirmed.
Checked: Marks internal approval before final posting.
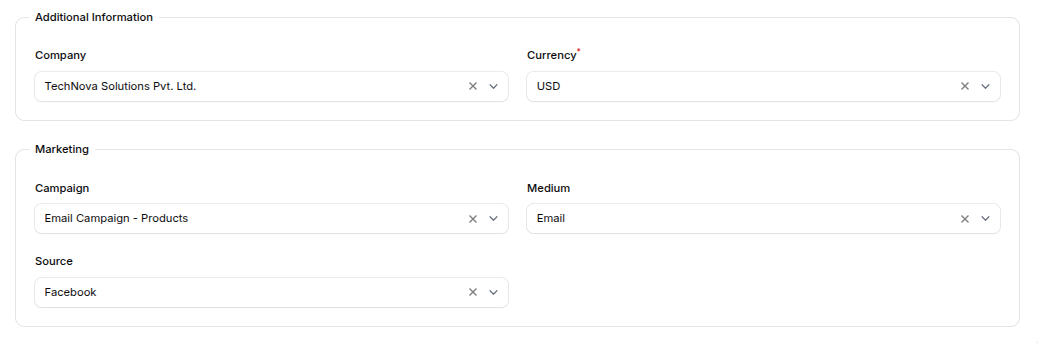
Additional Information:
Company: Select the company if you’re managing multiple entities.
Currency: Choose the currency for the invoice (default is USD).
Marketing Subsection:
Campaign: Select the marketing campaign linked to this sale.
Medium: Choose how the lead was generated (e.g., Email, Social Media).
Source: Specify where the customer came from (e.g., Website, Google).
Action Buttons
At the bottom of the form, you’ll find:
Create: Save the invoice.
Create & Create Another: Save and open a new invoice form.
Cancel: Discard changes.
What Happens After Creating the Invoice?
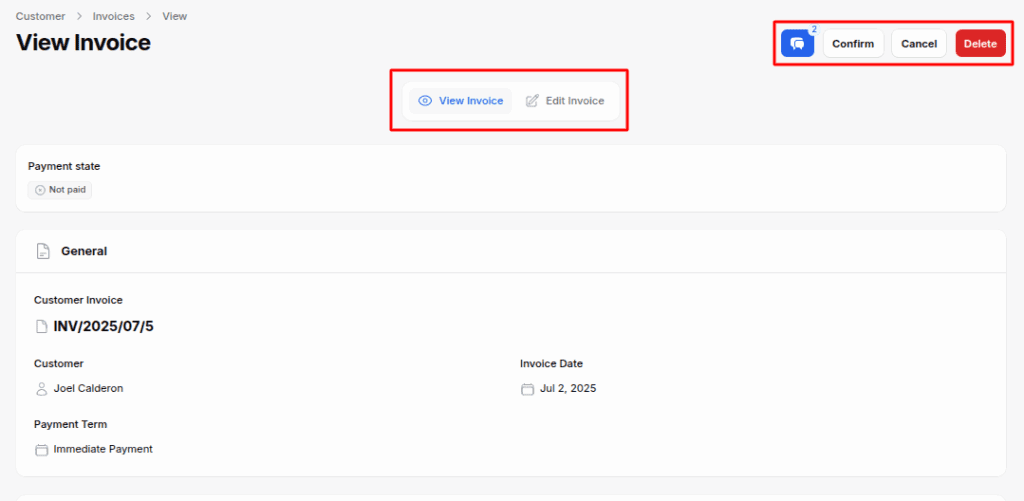
After you click Create, you’re taken to the ViewInvoice page.
If the invoice is still in Draft:
Edit: Make changes
Confirm: Finalize and post the invoice
Cancel or Delete: If not needed anymore
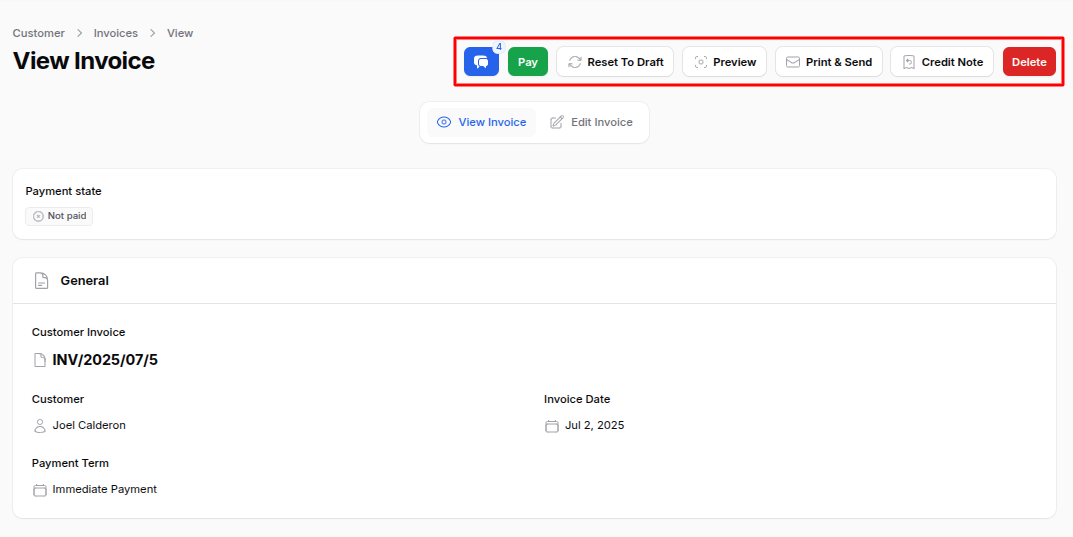
Once the invoice is confirmed:
Pay: Open a form to add payment details like amount, date, bank account, and payment method.
Reset to Draft: Revert to editable mode
Preview: Print or PDF view
Credit Note: Issue a refund or adjustment
Delete: Remove the invoice (if still allowed)
2. Automated Invoice Creation
If your sales process includes quotes, you can create invoices automatically. This tool is perfect for businesses that focus on product management or for those that have regular sales activities.
Here’s how the automated invoice flow works:
Step 1: Create a Quotation
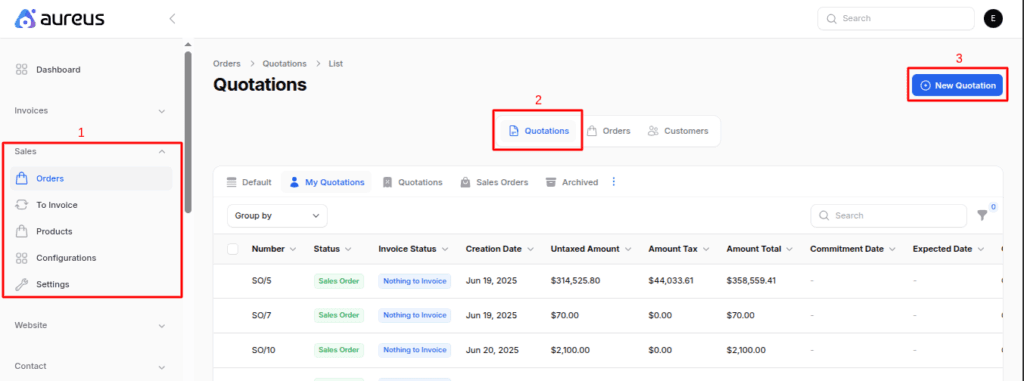
Go to Sales → Orders → Quotations → New Quotation
Sales: The main section where you manage all sales related activities.
Orders: Shows all customer orders and related documents.
Quotations: Contains price estimates or proposals shared with customers before confirming an order.
New Quotation: Used to create a new quotation by adding product details, prices, and terms for customer approval.
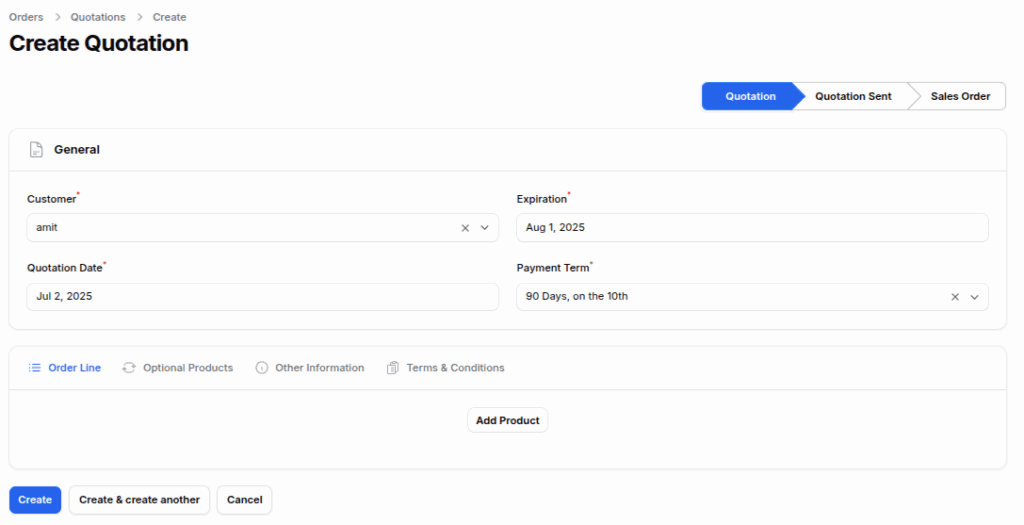
Fill in the quotation details:
General Section:
Customer: Choose the customer for the quotation.
Expiration: Set when the quotation expires.
Quotation Date: Enter the date the quotation is created.
Payment Term: Select the payment condition (e.g., Net 30, Immediate).
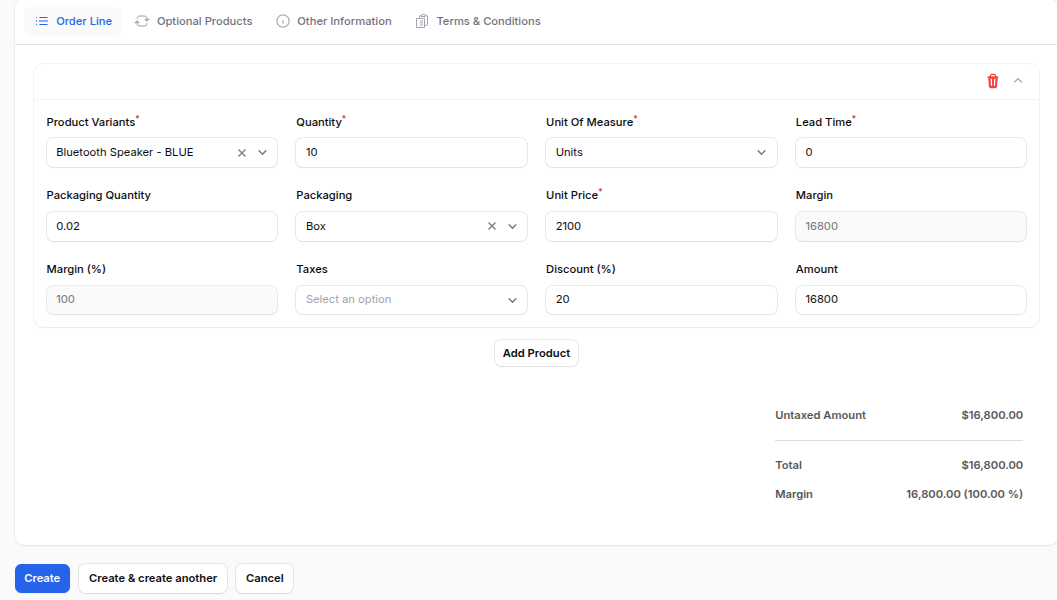
Order Line Section:
Product Variants: Select the specific product or variation.
Quantity: Enter the number of items or units.
Unit of Measure: Choose how the quantity is measured (e.g., Pieces, Dozens).
Lead Time: Specify the expected delivery time.
Unit Price: Add the price per unit or item.
Discounts: Apply any discount percentage or amount.
Taxes: Select the applicable tax rate for the product.
Optional Products:
Add related or upsell items that customers can choose to include with their order.
Other Information:
Salesperson: Assign the team member handling the order.
Customer Reference: Add the customer’s order or reference number.
Delivery Date: Specify when the products or services will be delivered.
Campaign/Medium/Source: Link the order to its marketing details.
Company and Currency: Select the company and preferred currency for the order.
Click Create to save.
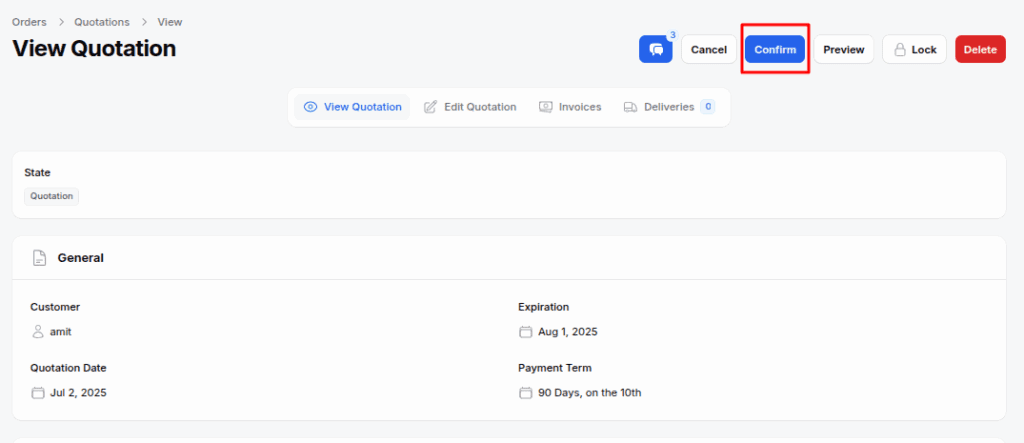
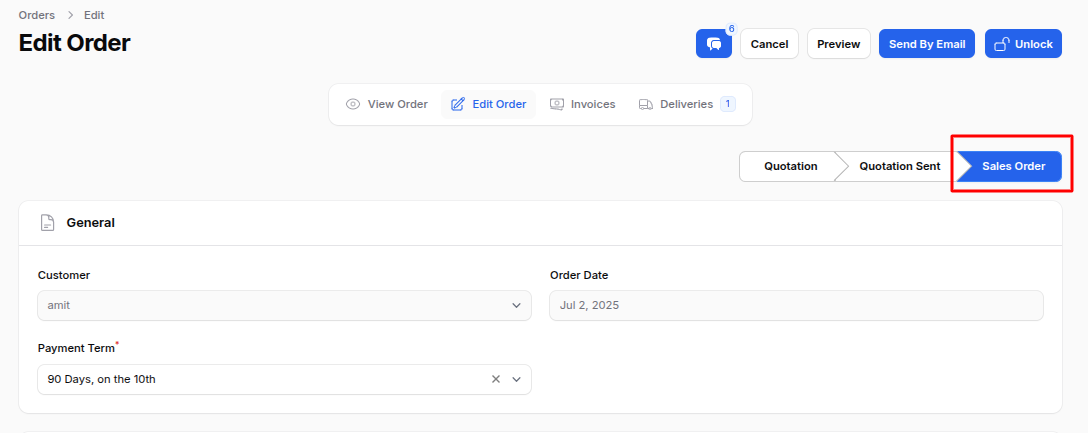
Step 2: Confirm the Quotation
Once the quotation is ready:
Click Confirm to convert it into a Sales Order.
Now, the quotation is confirmed and converted into a sales order.
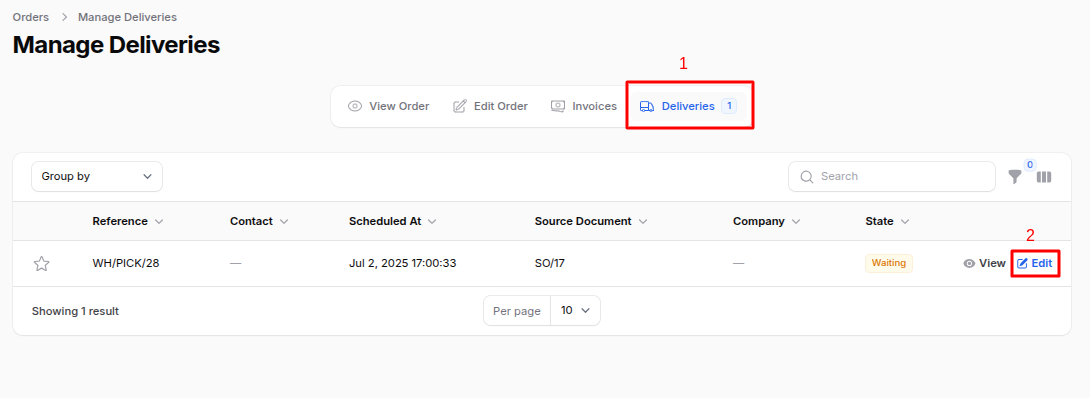
Step 3: Delivery Order (if products are stockable)
If you’re selling physical products:
Go to the Deliveries tab in the Sales Order
Edit the Pick: Review and adjust the delivery order before validation. You can modify product quantities, update source or destination locations, and ensure all delivery details are correct before confirming the shipment.
Add the Quantity: Enter the number of items to be delivered. Make sure the quantity matches the confirmed sales order before validating the delivery.
Validate the Pick Confirm the delivery order after verifying all details. This action finalizes the stock movement and marks the products as delivered in the system.
This step is optional if you’re selling non stockable items or services.
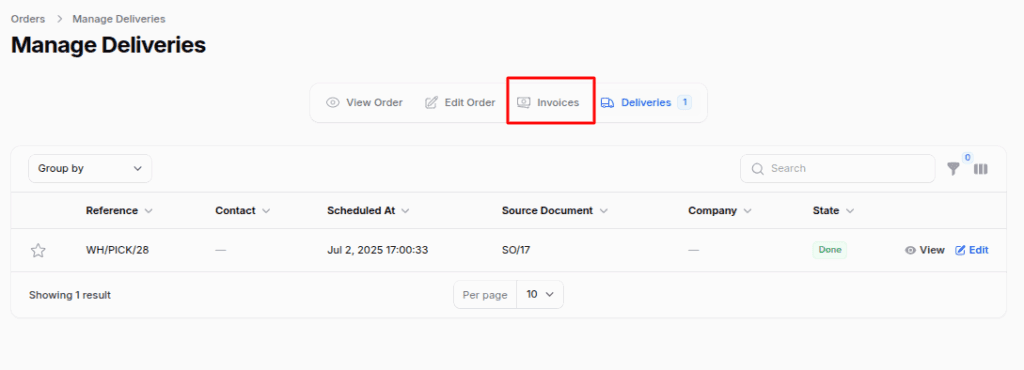
Step 4: Automatic Invoice Generation
In this step, the system automatically creates an invoice based on the confirmed sales order.
Once the delivery is validated, the system automatically generates the invoice with all product, pricing, and tax details filled in, saving time and ensuring accuracy in the billing process.
The system automatically generates an invoice based on the Sales Order.
You can then view, send, or register payment from the invoice screen.
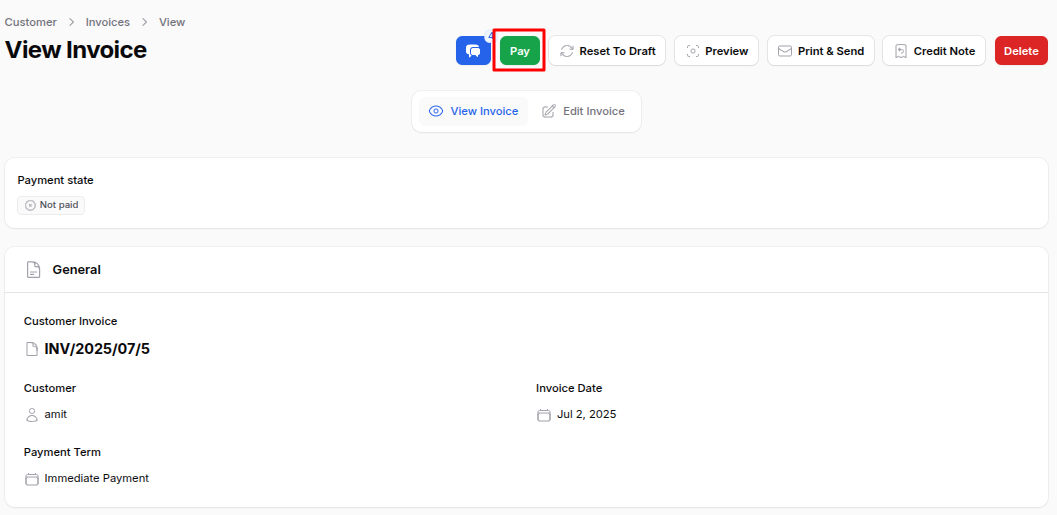
Final Step: Register Payment
After generating the invoice, the final step is to record the payment. This ensures your financial records stay accurate and up to date.
Go to the invoice and click Pay to:
Enter the payment amount
Choose the payment date
Select the bank account and payment method
Click Submit to mark the invoice as Paid
Complete Automated Invoice Flow
1
2
3
4
5
6
7
8
9
10
11
12
13
Quotation(Draft)
↓
Confirm Sale
↓
Sales Order(Confirmed)
↓
Delivery Order(Ifproducts require shipping)
↓
Create Invoice
↓
Send Invoice/Register Payment
↓
Sale Completed
Conclusion
In this blog, we explored the topic “How Can Aureus ERP Simplify Your Invoice Creation?”, explaining how the platform helps businesses manage billing with ease and accuracy.
An open source system simplifies invoice creation for every business need. Manual entry is ideal for custom invoices, while automation ensures faster, error free operations.
If you already use sales management, automated invoicing helps save time and ensures greater accuracy.
By using these features effectively, you can streamline your sales and accounting process while maintaining professional communication with your customers.
Need Help?
Facing issues while managing the Sales flow in AureusERP? Feel free to raise a ticket at our Support Portal


Be the first to comment.